Tech
Giang Pham
Apr 4, 2022
Expandable text with “read more” action in Android — not an easy task

At Wolt, user interfaces in consumer applications are highly valued. Not only does a good UI design deliver a modern and friendly look to the app, but it also boosts brand recognition. These two direct benefits can bring more indirect rewards to the product such as higher customer engagement and retention.
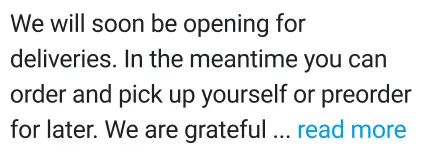
As mobile developers, we try our best to make our UI designers happy by fulfilling their artistic visions and pushing the app to its best form and functionality for customers. But to make those visions come true, we occasionally spend time scratching our heads hard as custom UI components aren’t always straight-forward to implement. An expandable text is one example. In our Wolt app, it looks like this:
Why it can get tricky to add expandable text in your app
When a piece of text is too long, the designer reasonably asks if it’s possible to truncate the text by having a certain line count limitation. In addition, an expand-action (i.e. “read more”) should be shown at the end of the last line. When the user taps the text, it expands with an animation to show the full content.
The idea is simple, but on the Android side, the implementation isn’t easy.
Let’s break down the problem: why is this difficult to implement? The first question is where do we truncate the text so that adding expand-action will make the final text fit nicely into the limited line count. The second thing is how to measure the height of the view when it’s collapsed or expanded to form its size change animation. This blog focuses on the first problem.
Before jumping into the problem, let’s agree on the terms that are used in this blog because they might be confusing:
Term | Explanation | Example |
Original text | The text that is in original form without being truncated | This is a long text that should be truncated at one point |
Expand action | A highlighted piece of text, usually at the end of a long text, that indicates the full text will be shown if it’s clicked | read more |
Truncated text | The text that is truncated at some point | This is a long… |
Final displayed text | The truncated text with the expand action that will be displayed to end user | This is a long… read more |
So, where or how to truncate the text…?
Luckily, the Android framework provides a powerful function to get an ellipsized text given its original form, the paint from the TextView, the text’s total width when it is written in one line, and the truncate position:

3 out of 4 parameters (original text, paint object, truncate position) can be found quite easily. Only the total width is quite tricky to calculate.
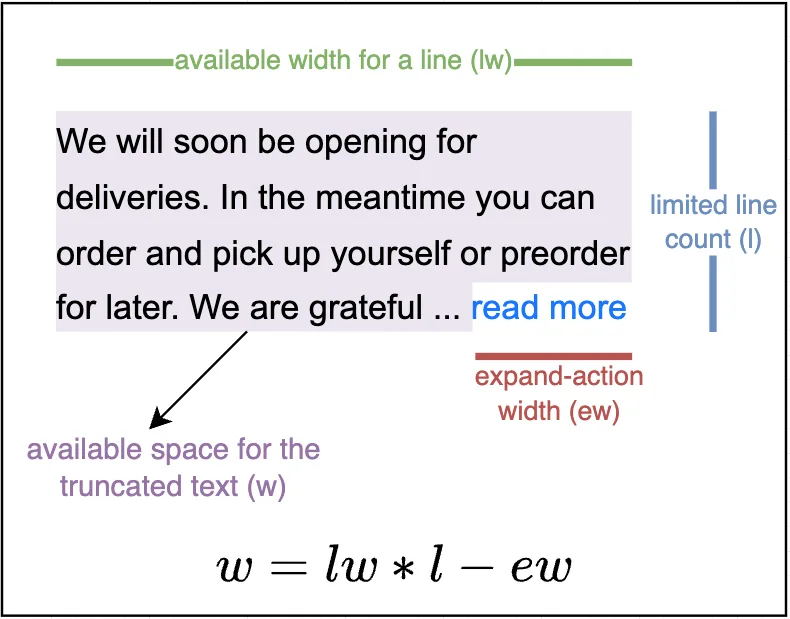
A naive approach would be multiplying the width of a line and the limited line count to take the total width of the final text and deduct the expand-action width. Assuming the expand-action width is always less than a line width (I cheated to make the problem simpler and easier to follow :p) , it can be calculated using the following function:

Please refer to Figure 2 above to understand the idea better.
Applying the function (1) and (2), we get the truncated text. All we need to do is append the expand-action to it and set the final displayed text to the TextView. The code will look somewhat like this (this is onMeasure function of the TextView’s subclass):
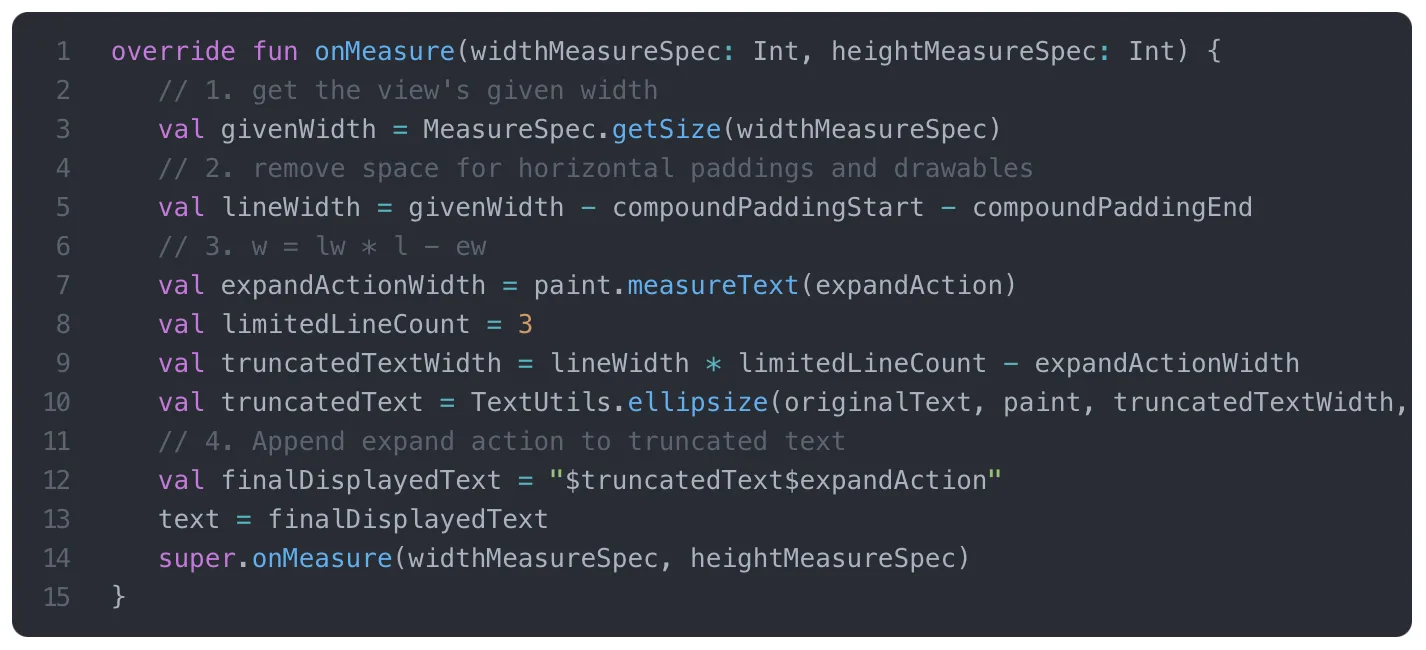
Notice that I have 3 as the limited line count. Let’s see how this looks.

This is wrong 🤔 🤔 🤔 Why do we have four lines showing instead of three? And why doesn’t the expand action appear at the end of the line?
Remember the needed width for the third parameter of function (1) is the total width when the text is written in one line. By doing some nitpicking, we can see the problem:
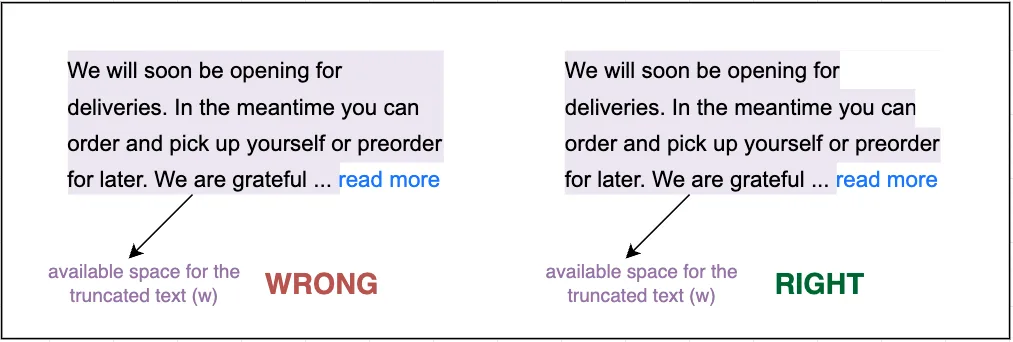
There are some white spaces at the end of some lines because the next word doesn’t fit into the previous line, thus, causing a line break. If we write the text in one line, we never include those spaces in the text. As they are included in the current calculation, the width is larger than what we want, it results in an extra line. This calculation needs to be more accurate. Here comes a better way.

The more accurate calculations
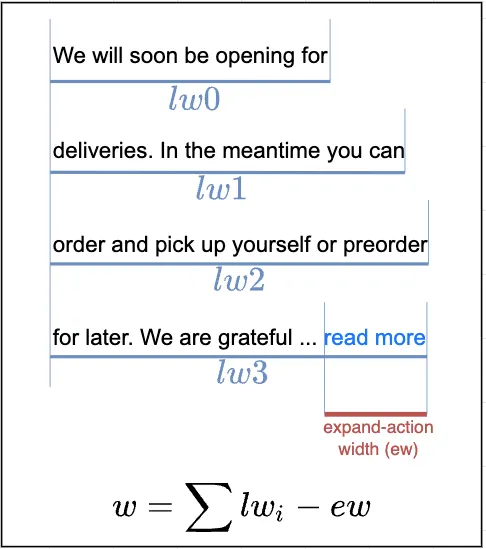
Because each line has its own width, we calculate the total width of the truncated text by summing the width of each line and deducting the expand-action width from that sum. This looks more precise mathematically. But is there any way to measure the width of a single line?
Fortunately, Android has a class called StaticLayout. This class provides developers with all text measurement capabilities and more. So now, here is the code with detailed explanations.
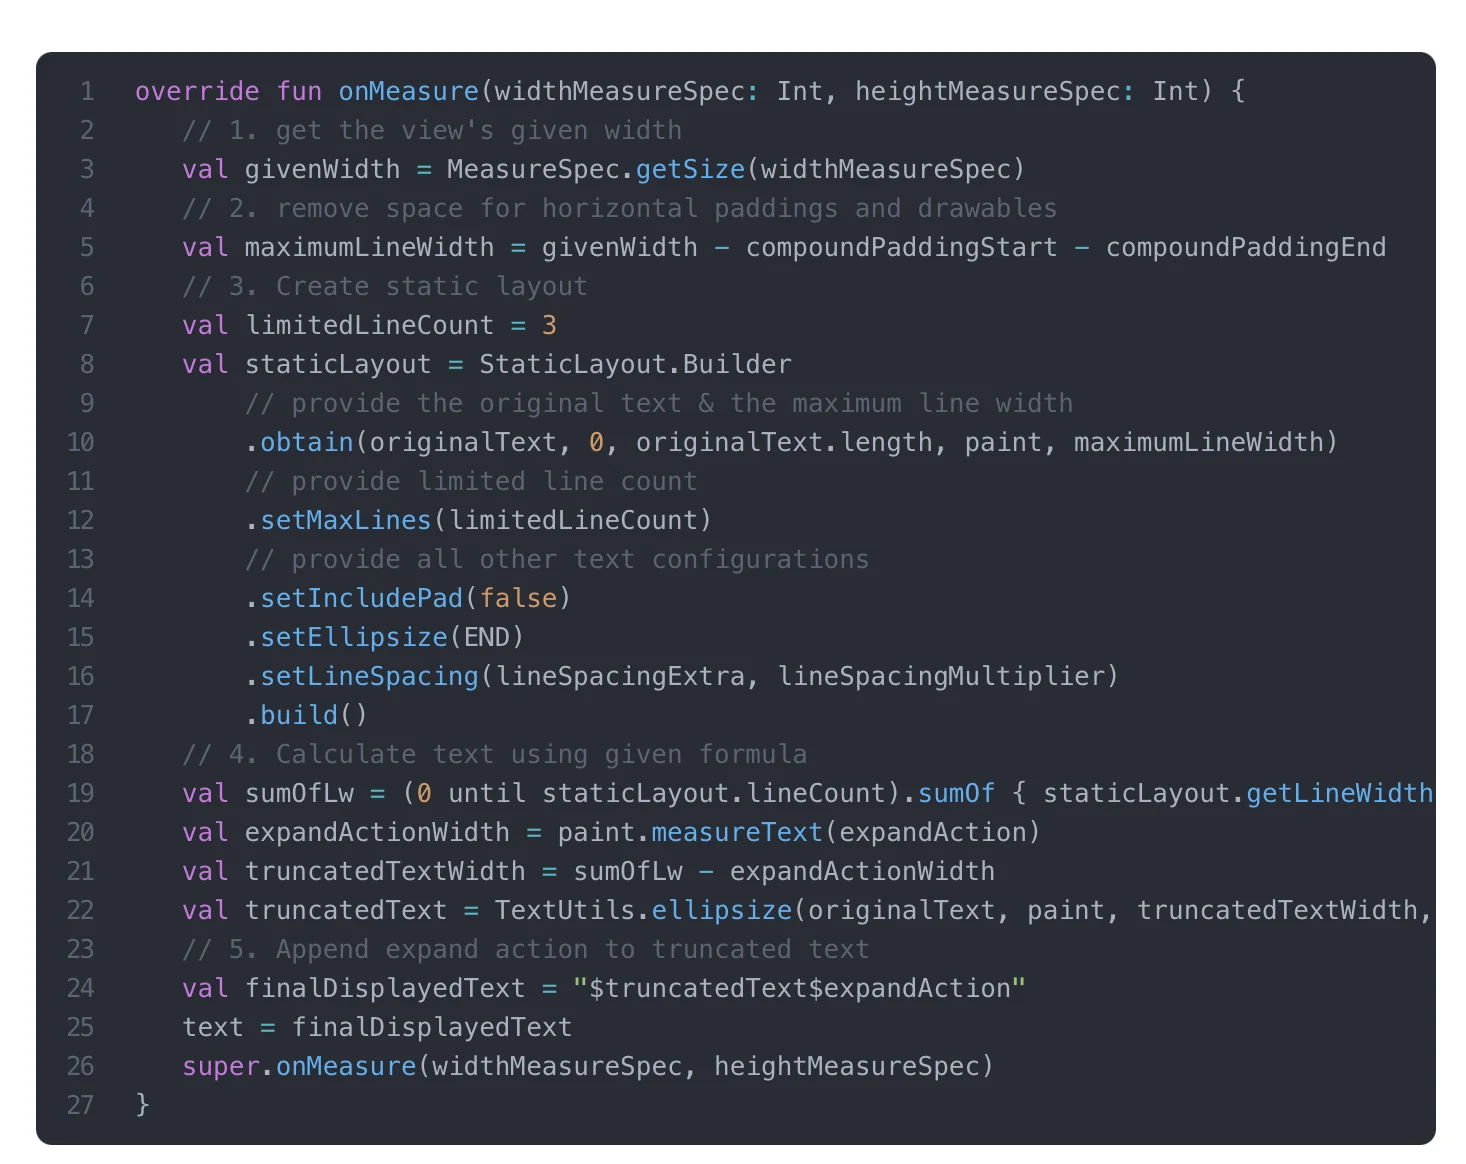
For SDK 22 or lower, you need to use the deprecated constructor of StaticLayout instead of its Builder’s static method `obtain` to retrieve an instance of this class.
The previous lineWidth becomes maximumLineWidth because the actual line width doesn’t need to take white spaces into account. Providing all information to StaticLayout, we can then get each line width by calling getLineWidth on the layout instance. The code looks a bit longer, but the result is satisfying.

Final thoughts and learnings
It has been a fun experience learning about this topic. When working with text, always try to open your eyes as wide as possible, a tiny mismeasurement can lead to undesired behavior. The second approach works for now, but working with text is always tricky and full of surprises. Also, the approach in this blog didn’t take edge cases into account. For example, if the text is too short and doesn’t require truncation, we don’t really need to append the expand action at the end. However, I hope it gives you an idea how to solve this problem.
This solution may break when changing the text wrapping style or even switching to a new writing system such as Arabic. If it happens, don’t panic, try to understand how the writing system is different from others and fine tune the calculations even more. Maybe the fix has been there all along in some of the existing APIs. In the end, the second approach may not be the last approach, and it’s always our job to find better solutions.
Apart from this correct rendering work, expanding and collapsing animations are also a key feature for this component. If you’re wondering how this motion part is done, I shamelessly attach my Github repository for this custom view.
If you want to work with us and create meaningful products, I proudly present Wolt’s jobs page.


